Custom AI models On OCVS GPU Shapes
- Nikhil Verma
- Nov 23, 2024
- 8 min read
OCVS A10 GPU-accelerated shape provide powerful, flexible infrastructure options tailored for deploying and running custom AI models. This shapes is designed to optimize performance for compute-intensive tasks, such as AI/ML model training and inference. Here’s how OCVS GPU shape can support the deployment of custom AI models effectively:
Dedicated GPU Resources: OCVS GPU shape offers virtual machines (VMs) with dedicated/Virtual GPUs, which significantly improve computation speed for large AI models. This is essential for training deep learning models, which typically require significant computational power.
Multi-GPU Support: Support for multiple GPUs per VM, allowing parallel processing, which can speed up training for complex models. You will get 4 Nvidia cards with 24GB GDDR6 memory per card which significant for AI-Accelerated apps
Tensor Cores and CUDA Support: GPU shape includes NVIDIA A10 GPUs with Tensor Cores optimized for deep learning tasks. They also support CUDA and cuDNN, which are crucial for accelerating neural network processing.
Virtualization and Scalability: VMware allows you to virtualize GPU resources, so you can allocate specific GPU memory and processing power to individual VMs based on model requirements. This is ideal for scaling model deployments across multiple environments.
Here in my example i will show you how i have allocated virtual GPU to Centos VM and this Virtual GPU utilized by TensorFlow.
Let's understand this with example. We are going to built MNIST model which will analyze image input and predict number on that image.
Architecture
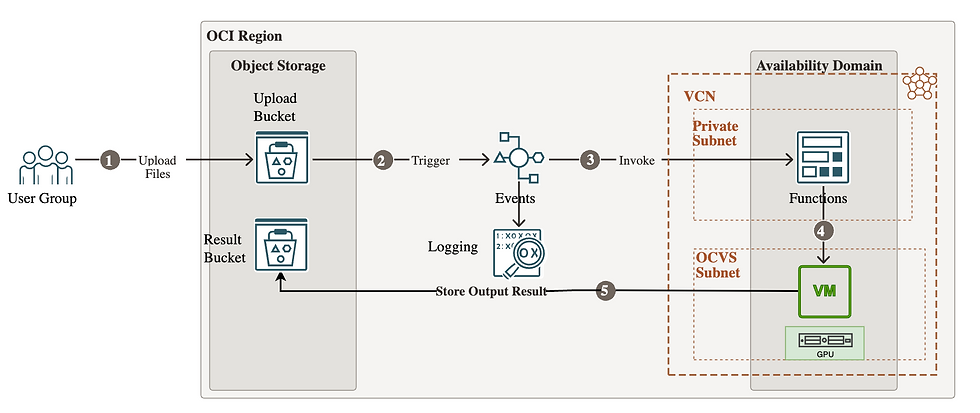
User Uploads Files to OCI Object Storage:
Users (user group) upload files to an OCI Object Storage bucket.
Trigger Event:
A trigger is configured on the Object Storage bucket, which activates when a new file is uploaded. This trigger initiates an event that can then be processed.
Invoke OCI Functions:
The event generated by the trigger invokes an OCI Function. This function serves as a serverless compute instance that processes the uploaded files and invoke model API running on GPU enabled VM.
Connect to GPU-Enabled VM on OCVS:
The function invokes a model API running on GPU enabled VM in Oracle Cloud VMware Solution (OCVS). The VM in the OCVS subnet has shared Virtual GPU resources, which is used to run custom MNIST model, process the input image data, and predict number.
Store Output in Object Storage:
Once the VM processes the data, it stores the output or results back in the Object Storage bucket for user access or further analysis.
Step 1 Prepare Platform Image which is used to run MNIST model
here i have used Centos9 as a platform image. I am assuming you already have OCVS GPU cluster and GPU cards is in shared state.

Prepared VM with below settings:
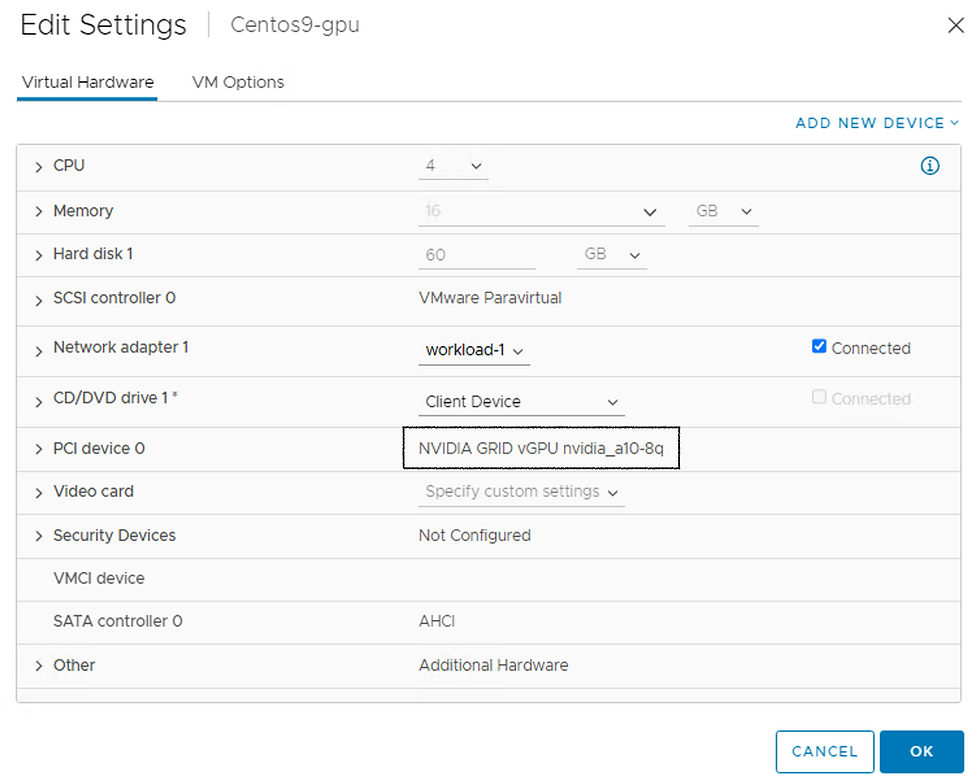
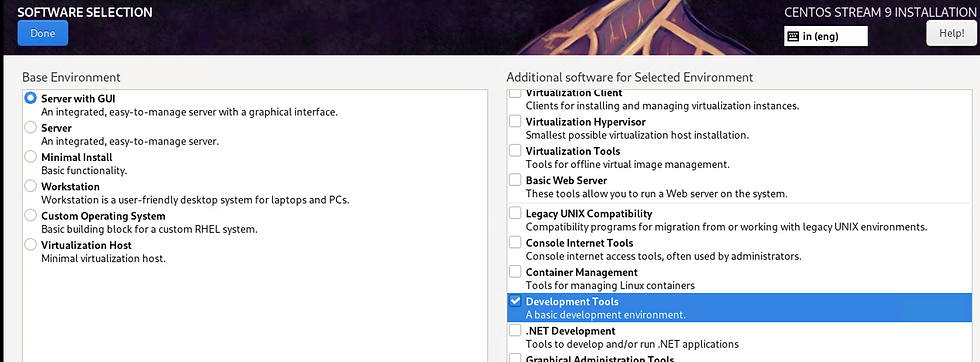
During Installation i have chosen these options:
Once VM is ready we need to install NVIDIA grid drivers as per your driver version on Esxi:
1) exit the X server by transitioning to runlevel 3: sudo init 3
2) Install Development tools which will ensure all Nvidia Prerequisites:
sudo dnf group install "Development Tools"
3) Install LLVM toolset:
sudo dnf install llvm-toolset
4) Initate your NVIDIA driver run file. In my case i am using this :
sudo sh ./NVIDIA-Linux-x86_64-535.183.01-grid.run
5) Once Installation completed validate it: nvidia-smi
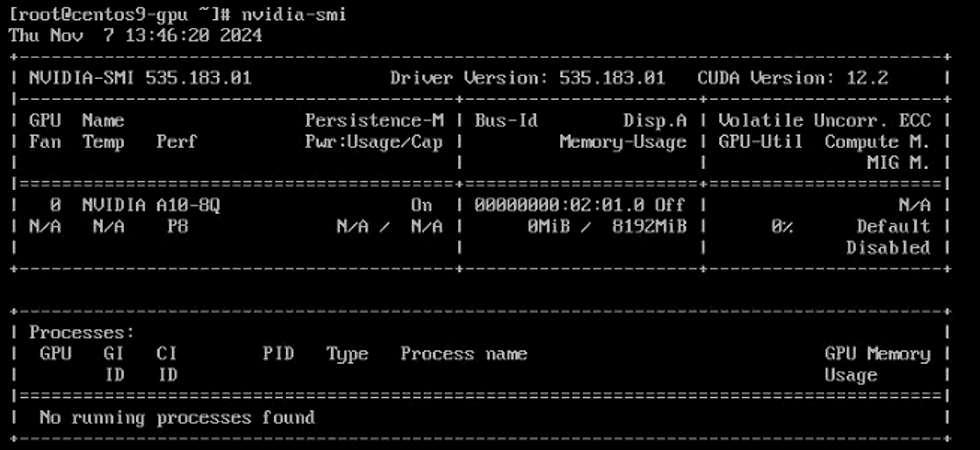
Install Cuda:
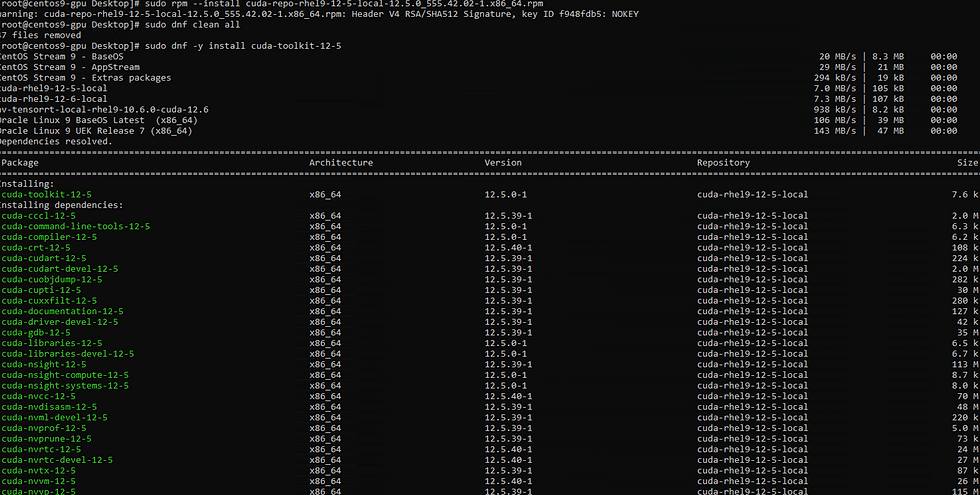
Install Cudnn:
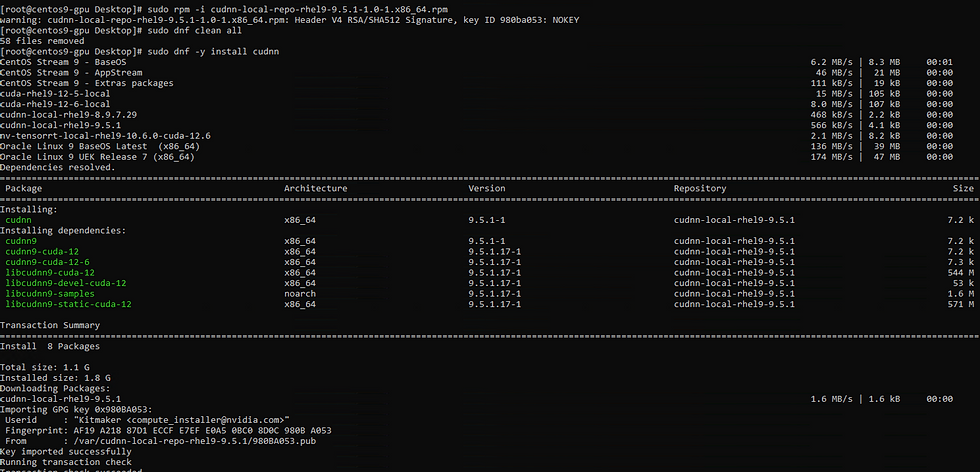
Install TensorRT:
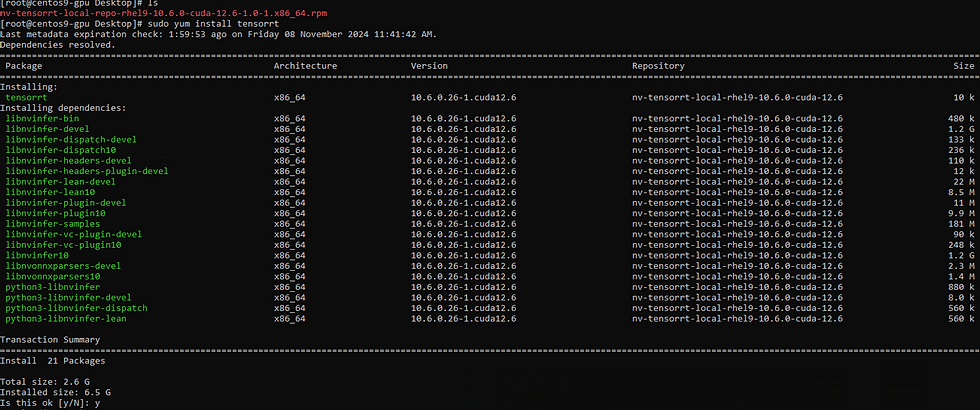
Install Python libraries:

Tensorflow should be matched with Cuda version:

To mount OCI buckets we need to install these two packages.
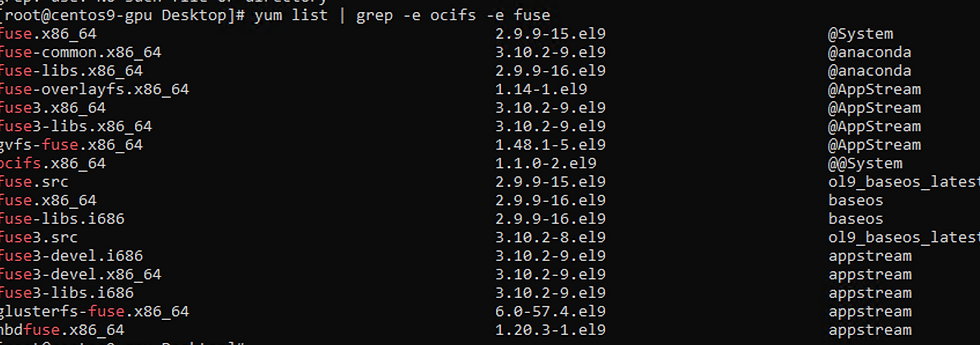
Follow this article to install OCIFS:
Step2 : Prepare MNIST model
This model trained on MNIST dataset which will predict number in an image.
import tensorflow as tf
from tensorflow import keras
from tensorflow.keras import Sequential
from tensorflow.keras.layers import Dense,Flatten
import pickle

(X_train,y_train),(X_test,y_test) = keras.datasets.mnist.load_data()
X_train = X_train/255
X_test = X_test/255
model = Sequential()

model.add(Flatten(input_shape=(28,28)))
model.add(Dense(64,activation='relu'))
model.add(Dense(10,activation='softmax'))

model.compile(loss='sparse_categorical_crossentropy',optimizer='Adam',metrics=['accuracy'])
history = model.fit(X_train,y_train,epochs=25,validation_split=0.2)

model_json = model.to_json()
with open("mnist_cnn_model.json", "w") as json_file:
    json_file.write(model_json)
model.save_weights("mnist_cnn_weights.h5")

# Save paths in Pickle for loading purposes
with open("mnist_model_paths.pkl", "wb") as paths_file:
    pickle.dump({"json": "mnist_cnn_model.json", "weights": "mnist_cnn_weights.h5"}, paths_file)
Let's generate model values:
Before start let's validate any GPU processing going on:

Let's start:
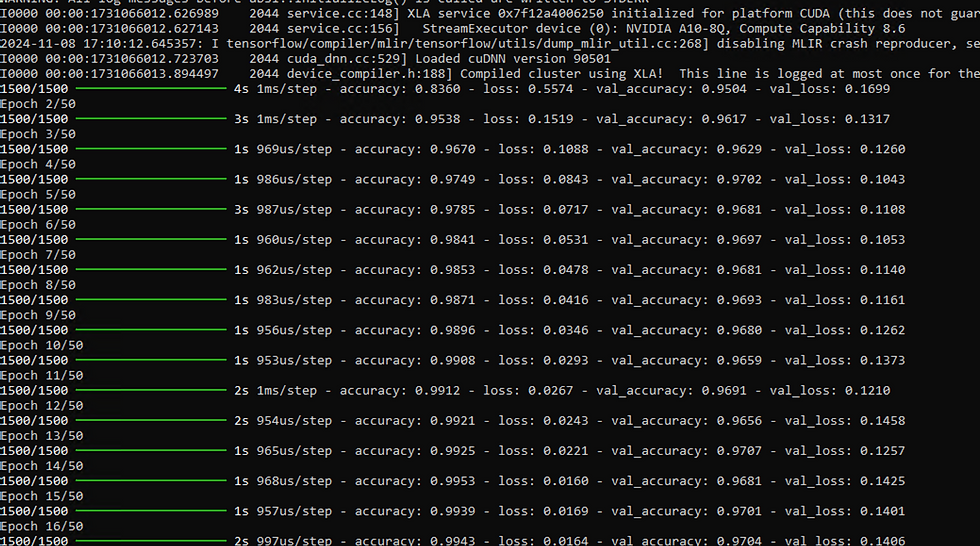
Validated GPU Usage : 6% utilized for Epoch.

Model generation completed.

Step3: Let's publish this model
from flask import Flask, request, jsonify
import numpy as np
from PIL import Image
import pickle
import tensorflow as tf
import os
from datetime import datetime

app = Flask(__name__)

# Load the pre-trained model paths (replace 'model.pkl' with your actual model path)
with open("mnist_model_paths.pkl", "rb") as paths_file:
    paths = pickle.load(paths_file)

# Load the model architecture (do this once to avoid repeated loading)
with open(paths["json"], "r") as json_file:
    model_json = json_file.read()

# Load the model architecture and weights
model_n = tf.keras.models.model_from_json(model_json)
model_n.load_weights(paths["weights"])

@app.get("/")
def read_root():
    return {"message": "Welcome to the Image Prediction API"}

@app.route('/predict', methods=['POST'])
def predict():
    try:
        # Get the JSON data from the request
        data = request.get_json()
        filename = data.get('filename')

        if not filename:
            return jsonify({"error": "No filename provided"}), 400

        # Construct the full path to the image
        full_path = os.path.join('/mnt', 'Nikhil', filename)

        if not os.path.exists(full_path):
            return jsonify({"error": f"File {filename} not found"}), 404

        # Open and preprocess the image
        img = Image.open(full_path).convert('L')
        img = img.resize((28, 28))
        img = np.array(img)
        img = img.reshape(1, 28, 28, 1)
        img = img.astype('float32')
        img = img / 255.0

        # Make a prediction
        value = model_n.predict(img).argmax(axis=1)

        # Generate the output filename with a timestamp
        today = datetime.now()
        d1 = today.strftime("%d-%m-%Y-%H-%M-%S")
        file_name = os.path.join('/mnt', 'nikhil-result', f"test_{d1}.txt")

        # Save the prediction data to a file
        prediction_data = f"Predicted Data: {value[0]}\n"
        with open(file_name, "w") as file:
            file.write(prediction_data)

        # Return the prediction as a response
        return jsonify({"Number you have entered": int(value[0])})

    except Exception as e:
        return jsonify({"error": str(e)}), 500


if __name__ == '__main__':
    app.run(host='192.168.70.50', port=5000)
Till here our model is ready.
Step4: Buckets Creation
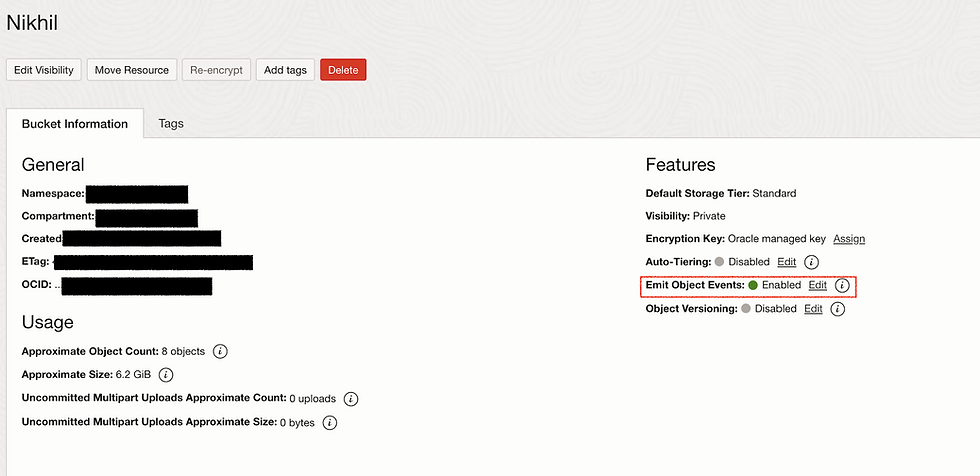
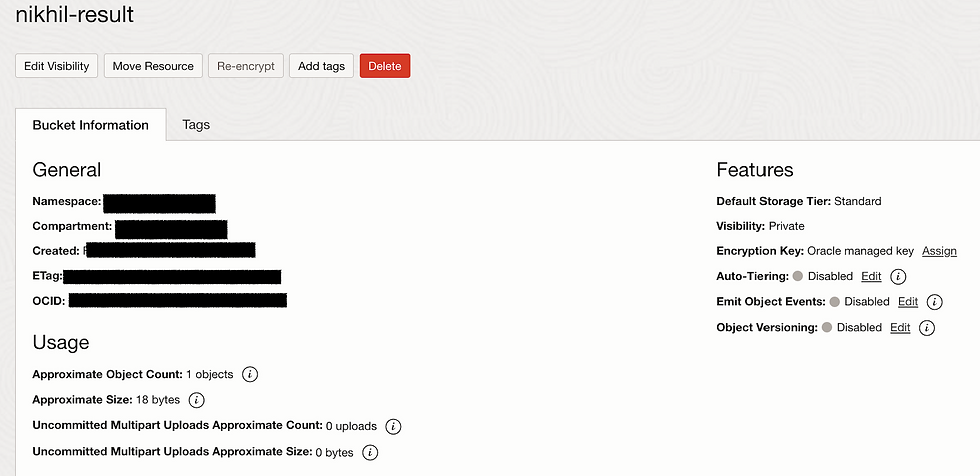
Let's prepare Buckets. Basically we need two buckets one for uploading pictures and second will be used for result store.
During Upload Bucket creation we need to make sure Emit Object Events Enabled.
Result Bucket should be normal.
Step5 : Function Creation
Within the context of this function, the primary objective is to extract the bucket event in order to retrieve the Upload Object Name. This extracted object name is subsequently utilized to invoke the Model API. The purpose of this interaction with the Model API is to generate a result output, which is then stored in the Result Bucket. By following this sequence of actions, the function is able to effectively process the data flow, leveraging the extracted object name to trigger the Model API and produce the desired output in the designated storage location.
import io
import json
import logging
import requests


from fdk import response


def handler(ctx, data: io.BytesIO = None):
    try:
        # Parse the incoming event data
        event_data = json.loads(data.getvalue().decode("utf-8"))

        # Extract key information from the event data
        event_type = event_data['eventType']
        bucket_name = event_data['data']['additionalDetails']['bucketName']
        object_name = event_data['data']['resourceName']

        # Log or process the event details as needed
        print(f"Event Type: {event_type}")
        print(f"Bucket Name: {bucket_name}")
        print(f"Object Name: {object_name}")
        internal_url = "http://192.168.70.50:5000/predict"
        data = {"filename": object_name}

        response = requests.post(internal_url, json=data)

        if response.status_code == 200:
            print(response.json())
        else:
            print("Error:", response.text)


        # Your processing logic here
        # For example, call another function, store metadata, etc.

        return {
            "status": "Success",
            "message": "Event data processed",
            "eventType": event_type,
            "bucketName": bucket_name,
            "objectName": object_name
        }

    except Exception as e:
         print(f"Error processing event data: {e}")
         return {
             "status": "Failed",
             "message": str(e)
         }
Func.yaml
schema_version: 20180708
name: object-storage-predictions
version: 0.0.18
runtime: python
build_image: fnproject/python:3.11-dev
run_image: fnproject/python:3.11
entrypoint: /python/bin/fdk /function/func.py handler
memory: 256
Requirements.txt
fdk>=0.1.83
requests
Step6
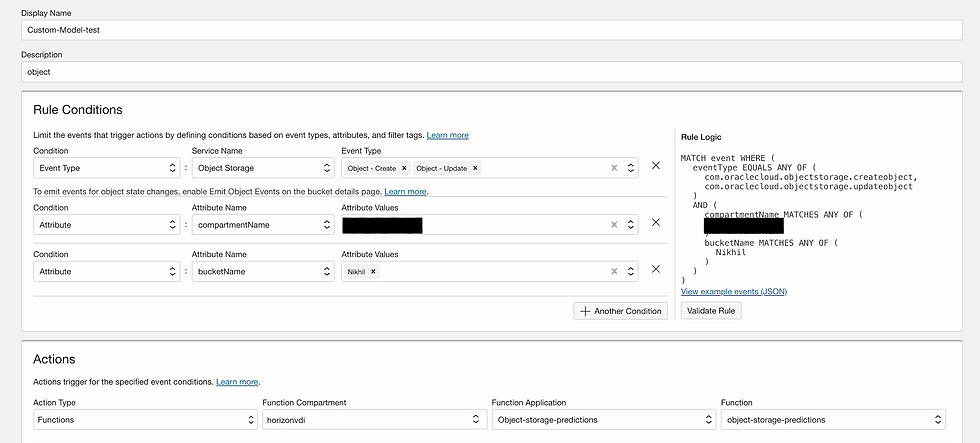
Enabling Event Rules within a system allows for the automation of specific actions triggered by predefined events, such as when an event is generated within a Bucket. By configuring Event Rules, you can set up a mechanism that will call a designated function or script automatically in response to the occurrence of the specified event. This capability streamlines processes by eliminating the need for manual intervention each time an event occurs, thus enhancing efficiency and reducing the margin for error. When a Bucket event is detected, the corresponding function is invoked, enabling seamless execution of tasks or processes associated with that event. This automation not only saves time but also ensures consistency in handling events, thereby enhancing the overall reliability and effectiveness of the system.
Step7:
To mount buckets to the GPU VM that we have created on Oracle Cloud VMware Solution (OCVS), we need to follow a series of steps to ensure seamless integration and efficient data access. By establishing this connection, we can leverage the power of the GPU for processing data stored in cloud buckets, enabling advanced computations and data analysis.
Firstly, we need to ensure that the necessary permissions are set up to allow the GPU VM to access the cloud buckets. This involves configuring the appropriate IAM roles and policies to establish secure communication between the VM and the cloud storage service. By granting the required permissions, we can guarantee that the VM has the necessary access rights to read from and write to the designated buckets.
Next, we will need to install and configure the relevant storage drivers on the GPU VM. These drivers will enable the VM to communicate with the cloud storage service and interact with the data stored in the buckets effectively. By setting up the drivers correctly, we can ensure that the VM can seamlessly mount the buckets and access the data within them without any issues.
Once the permissions and drivers are in place, we can proceed to mount the cloud buckets to the GPU VM. This involves specifying the bucket's location and mounting it to a directory within the VM's file system. By mounting the buckets, we can treat them as local storage within the VM, allowing us to interact with the data as if it were stored directly on the VM itself.
By following these steps, we can successfully mount buckets to the GPU VM on OCVS, enabling efficient data access and processing capabilities. This integration opens up a world of possibilities for leveraging the GPU's computational power in conjunction with cloud storage, empowering us to tackle complex data tasks with ease and efficiency.
Mounted Upload Bucket : Nikhil
ocifs --cache=/var/tmp/ocifs-cache --auth=api_key --config=/root/.oci/config -f --debug=all Nikhil /mnt/NikhilMounted Result Bucket: nikhil-result
ocifs --cache=/var/tmp/ocifs-cache --auth=api_key --config=/root/.oci/config -f --debug=all nikhil-result /mnt/nikhil-result
Step8:
Now we need to start Flask function to receive API calls.

Function showing running Nvitop

Validation
For validation, I have meticulously crafted three distinct .jpg images, each containing a varying number of objects. The purpose of this exercise is to assess the reliability and accuracy of our model when presented with these diverse scenarios.
Let's delve into the first image, labeled as actual_a1.jpg. This particular image serves as the initial litmus test for our model's validation process. By subjecting it to our model, we aim to gauge its ability to accurately identify and classify the objects within this specific image.
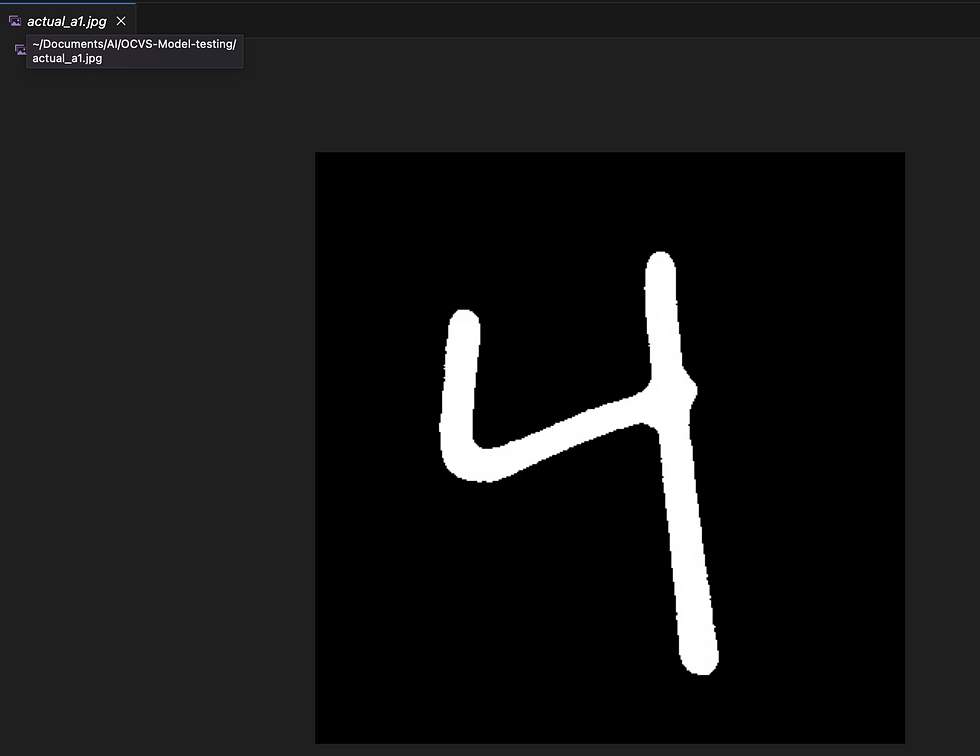
Let me upload in Bucket
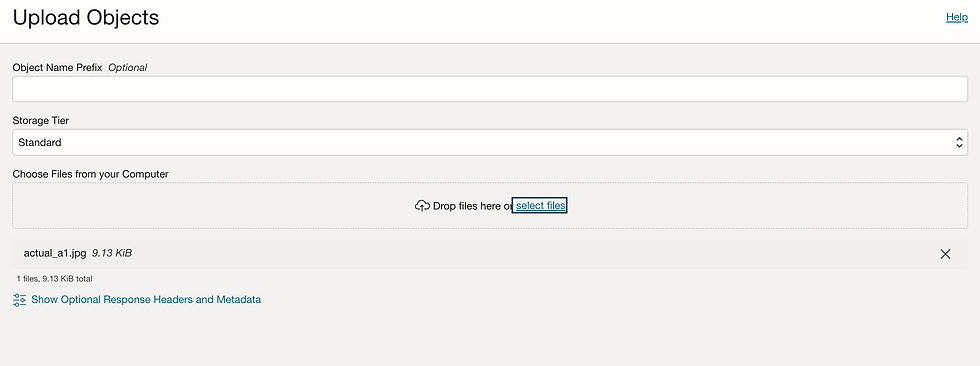
Received request from Function

Let's validate result in result bucket.


It predicts correct value.
Let's try with another number.

Function post request to our function.

I can see result file:

Predicted right number.

This is just one of the many use cases where the OCVS GPU node can prove to be incredibly beneficial. The versatility of this technology allows for its application across a wide range of scenarios and industries. By harnessing the power of GPU processing, users are granted access to a level of control and efficiency that was previously unattainable. Whether it's accelerating complex computations, enhancing visual processing tasks, or optimizing machine learning algorithms, the OCVS GPU node opens up a world of possibilities for those seeking to leverage cutting-edge technology for their specific needs. With the ability to tap into the immense computational capabilities of GPUs, users can expect faster processing speeds, improved performance, and ultimately, a more streamlined and effective workflow across various applications.

Comentarios